Add scopes to your templates for a better organization
The new Xporter v5.0 brings improvements in performance, organization and integrations and, we want to guide you through it all. That’s why we’ll be talking about its features in a series of articles, so you can get the most out of this new version.
One of these new features is the Template Scopes. As you know, you can use Xporter from many locations on JIRA, like Single Issue (Xporter Selector and from Export menu), Multiple Issues (from Issue Search Export menu and Bulk operation) and on workflow Post-Function.
Until now, the existing templates appeared in all of these locations and we realized it wasn’t useful to have a template available in Multi Issues Export when it was designed specially for a Single Issue.
What does it mean?
This feature allows you to define where a template will be available to be used. Now you can have templates available only for Single Issue or Bulk or, even both. You just need to add specific scopes to your templates.
The available scopes are:
- Single Export
- Bulk Export
- Schedule Reports
- JIRA Service Desk
- Workflow Post Functions
- Xporter Reports (This will be presented soon)
There are two ways to define Scopes for each template: when you’re adding a new template or directly updating the Scopes when the template already exists.
1) Changing Template Scopes when adding a new template
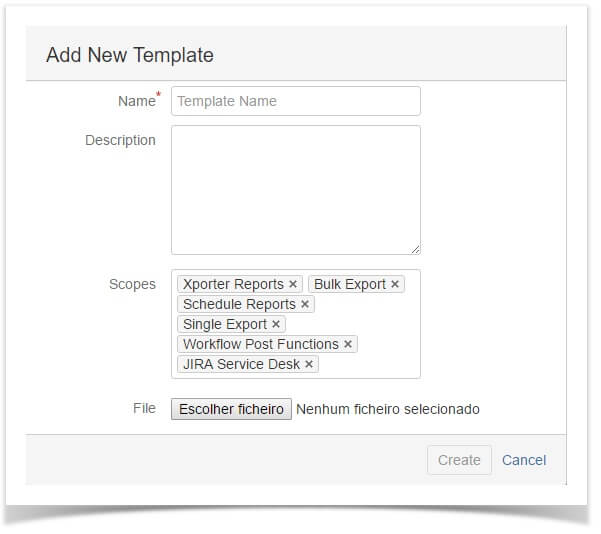
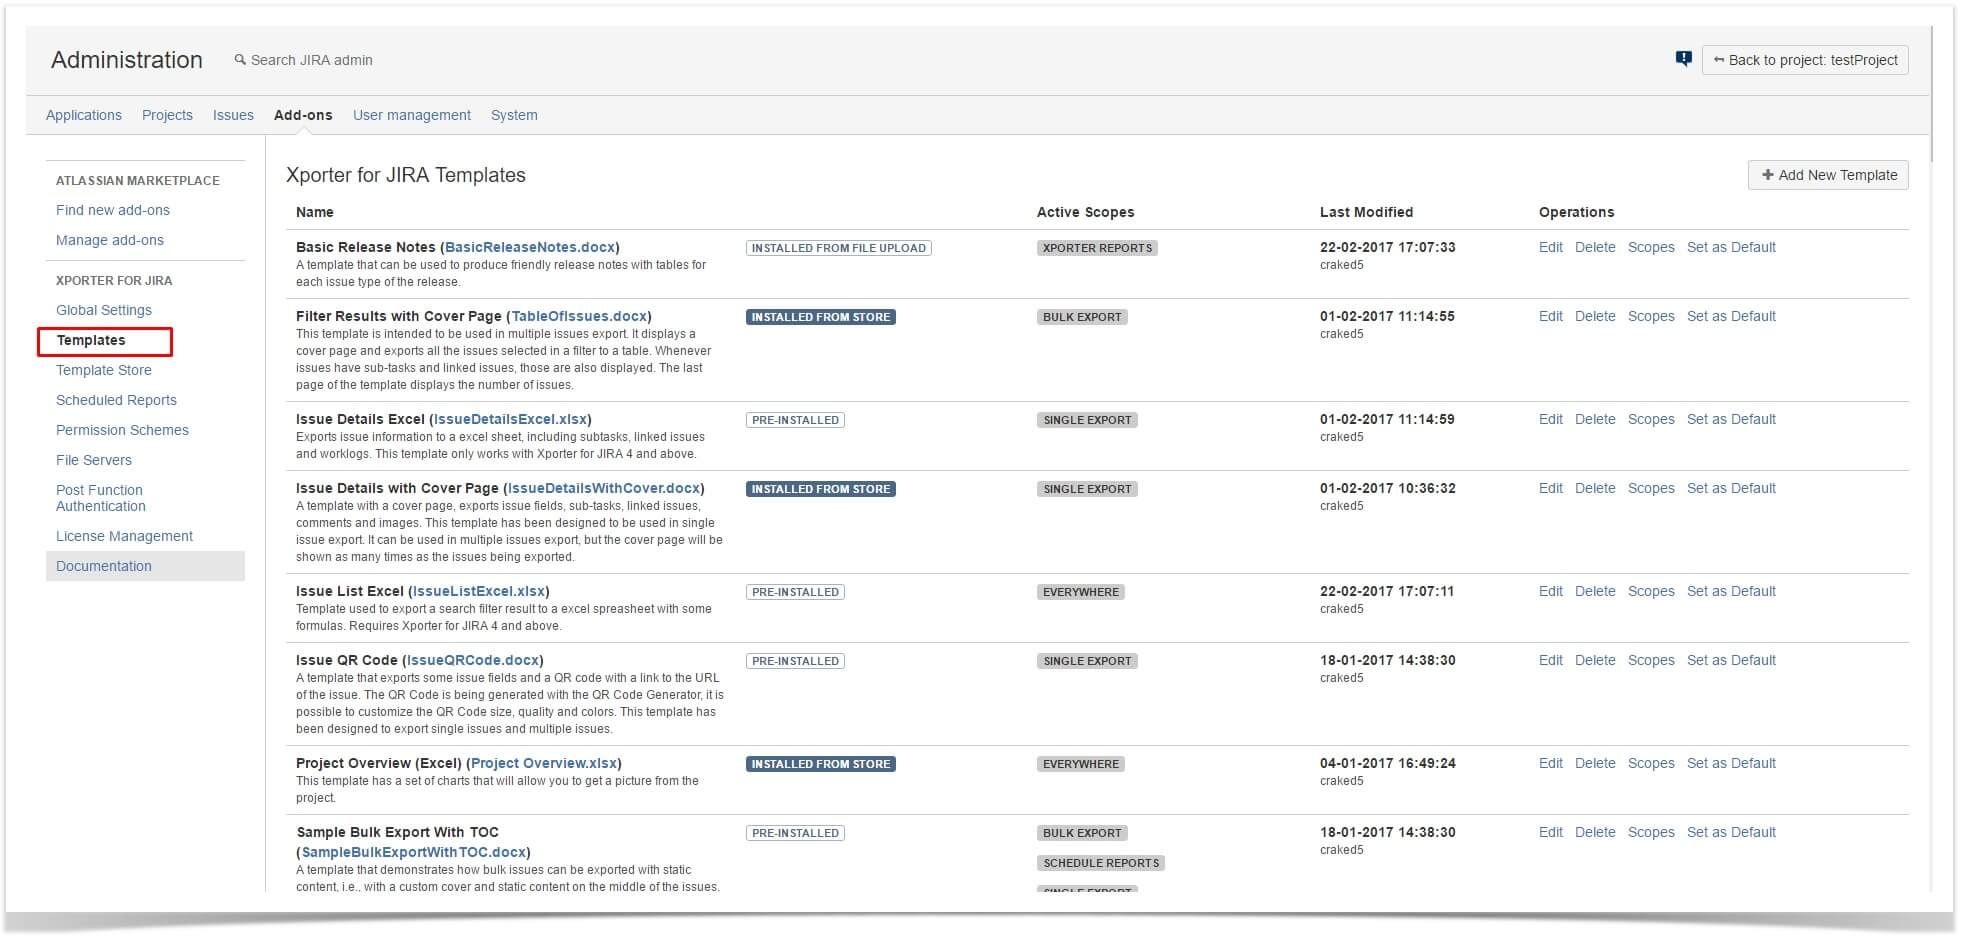
When adding a new template, there will be an option to select all its scopes. To do this, navigate to the add-ons administration part of JIRA and go to “Templates” within the Xporter for JIRA section. Now click in the “Add New Template” button.
You should be prompted with a window just like this:
Now you can remove/add scopes at will and when pressing the “Create” button a new template will be added in the defined scopes.
2) Updating Template Scopes directly
When the template already exists, you can change its scope directly on it.
First, navigate to the JIRA add-on administration menu and in the Xporter for JIRA area go to the sub-menu Templates.
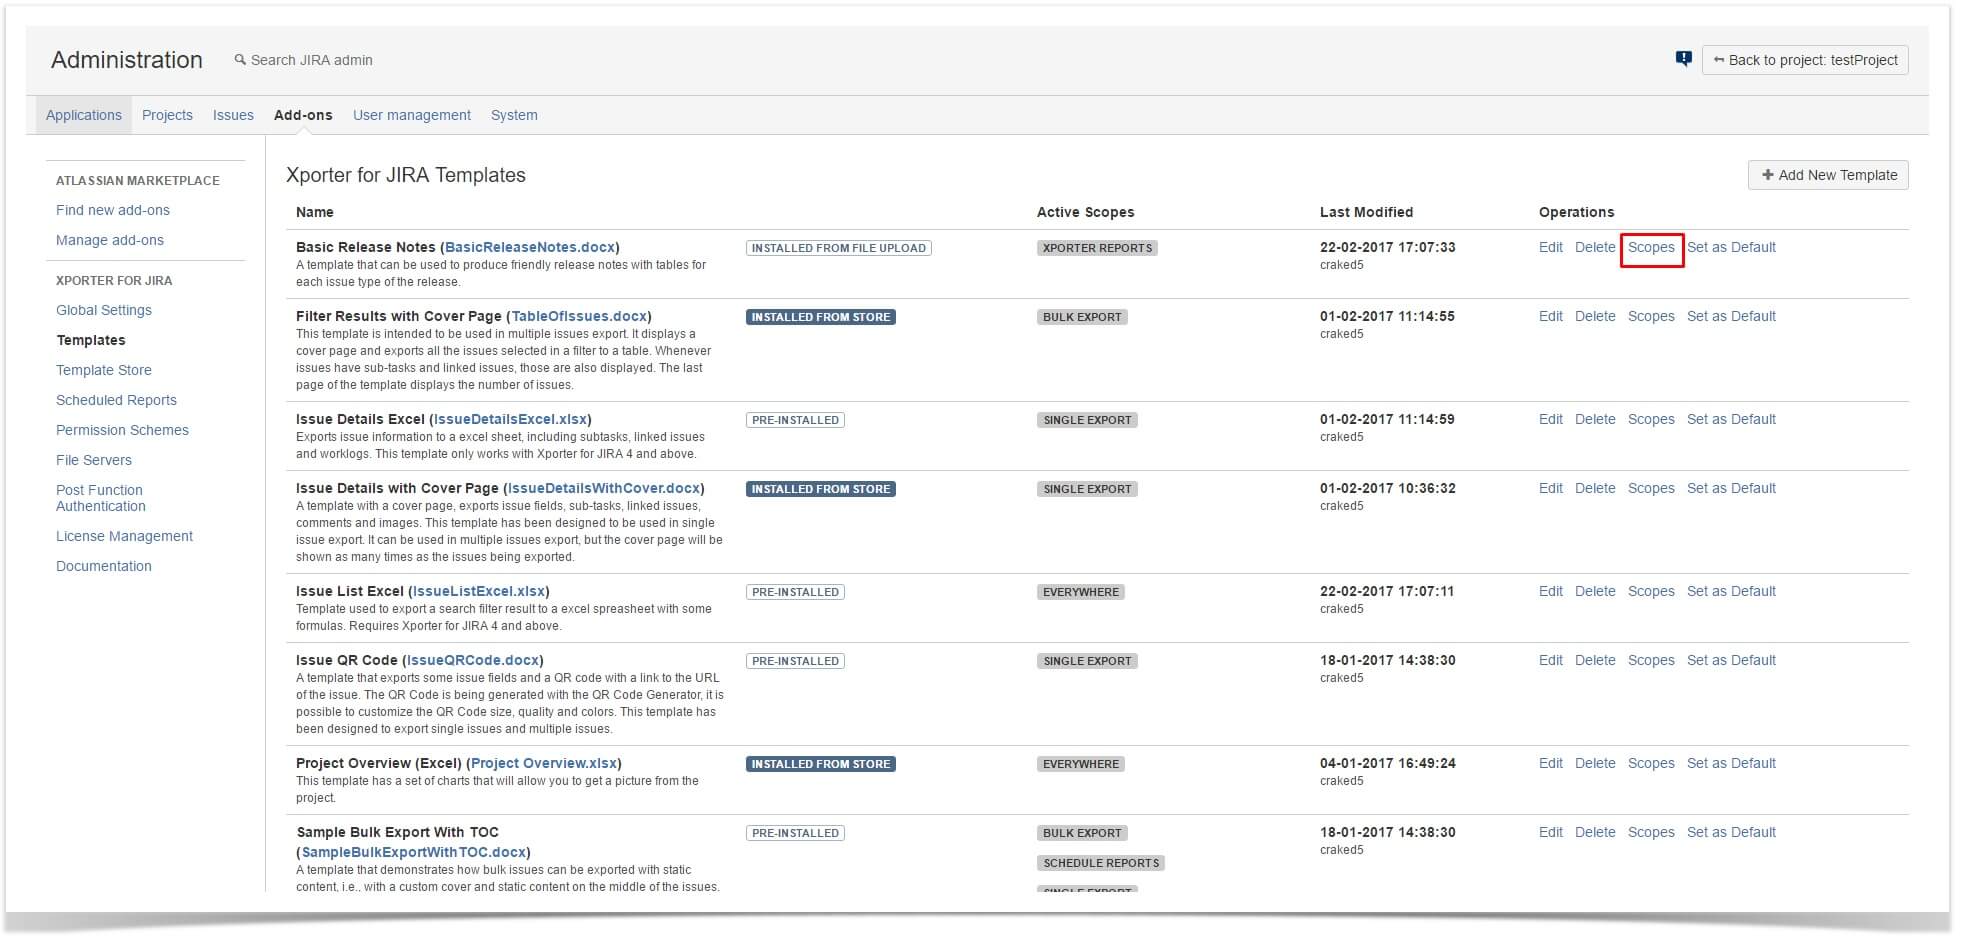
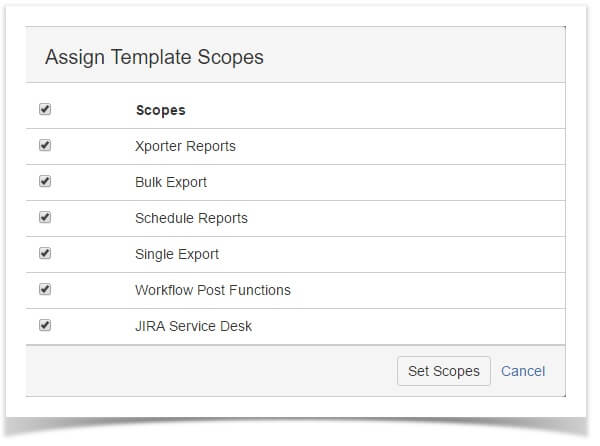
Now you can see the Xporter template list. For each of these templates, there is a button called “Scopes“. Press it to get to the Scopes window:
To change the Scopes for a specific template just tick/untick the Scopes boxes and click “Set Scopes” when you’re done.
Now you’ll find your templates more organized and categorized. We hope you find this feature useful and keep on the next articles!


